Quick Start Guide
Get up and running with your tbd 16 in five minutes.
Make sure the device is powered and connected to audio — see Connect & Power if you haven’t yet.
1. Power On
Connect the tbd 16 via USB-C. The OLED display shows a short boot sequence while the device initialises. Boot takes approximately 30–50 seconds.
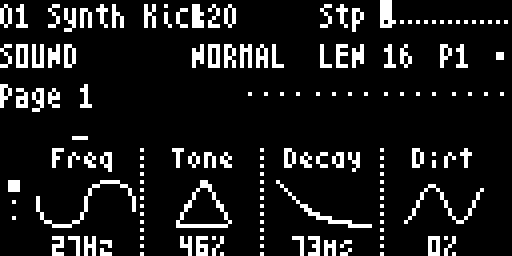
Once booted, the Sound screen appears, showing parameters for Track 1.
The top of the display reads Stp — the default sequencer mode.
2. Program your first pattern
Step programming is the heart of the tbd 16 workflow. You draw a pattern step-by-step directly on the 16 step buttons.
- Press any of the 16 step buttons to toggle steps on or off for the current track
- Press PLAY to start the sequencer — you’ll hear the pattern loop
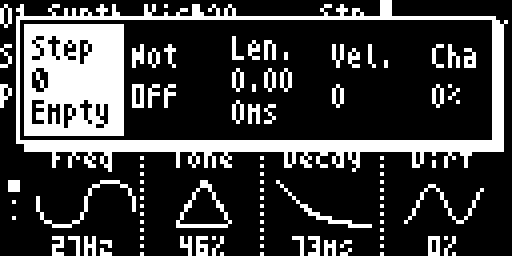
Long-press a step button to open the Step Overlay, where you can set note, velocity, length, chance, repeat, and chord notes for that step.
3. Switch tracks
- Press ←/→ arrows to move between tracks (the track number appears in the top-left of the display)
- Press FUNC3 to cycle through Sound → Track Mixer → Track Parameters views
- Medium-press FUNC3 to open the Track Select Overlay — press any step button (1–16) to jump directly to that track

4. Adjust parameters
Turn Knobs 1–4 to adjust the four parameters shown on the current page. Use ↑/↓ arrows to navigate between parameter pages — the page name and dot indicators appear at the bottom of the screen.
Hold HYPER while turning a knob for fine-tuning (±1 per step).
Want per-step parameter changes? While holding a step button on the Sound screen, turn any knob — the value is locked to that step only. See Parameter Locks for more.
5. Understand the sequencer modes
You’ve already been using Stp, the default mode. There are two more, all shown in the top of the display:
| Mode | Label | What the step buttons do |
|---|---|---|
| Step | Stp | Step buttons toggle individual steps on/off — the mode you used in step 2. This is the default mode on boot. |
| Play | Ply | Play notes live. Drum tracks → 8 drum pads; synth tracks → chromatic keyboard. The pattern keeps playing back whatever you’ve programmed. |
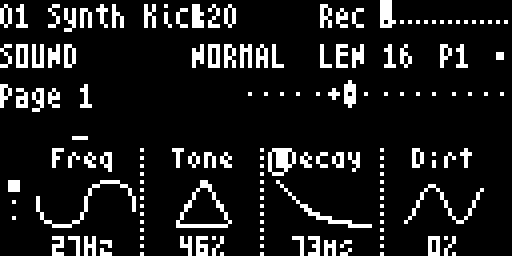
| Record | Rec | Same layout as Play, but anything you play is recorded live into the pattern. |
Press REC to cycle between them (Stp → Ply → Rec → Stp …).
6. Play or record live
Press REC once to switch from Stp to Ply — now the step buttons become a live instrument:
- Drum track (Tracks 1–8 by default) — step buttons 1–8 are the drum pads
- Synth track (Tracks 9–16) — step buttons act as a chromatic keyboard; Step 1 and Step 8 shift the octave down and up
Press PLAY to start the sequencer and jam along with the pattern. To capture what you play, press REC again to switch to Rec — now your playing is recorded live into the pattern.
7. Mix your tracks
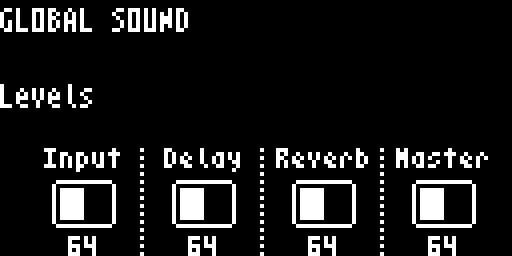
Press FUNC2 to jump to the Global Sound screen for quick master access:
| Knob | Parameter |
|---|---|
| Knob 1 | Input Level |
| Knob 2 | Delay Level |
| Knob 3 | Reverb Level |
| Knob 4 | Master Level (click to mute/unmute) |
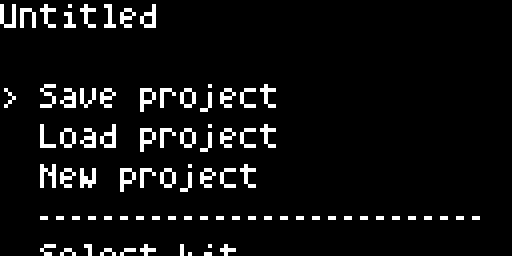
8. Save your work
Press FUNC1 to open the Project menu. Select Save to save your current project to the SD card.
Next steps: read Navigation to learn every function-button shortcut, or jump into Sound Parameters and Parameter Locks to go deeper. Changing the MACHINE or PRESET of a track is covered in Macros & Presets.