Ableton LIVE Setup
On this page you will learn how to connect your automat controller with Ableton LIVE.
-
Connect the automat controller to your PC/MAC via USB & plug the power supply next to USB port on the back of the automat controller.
-
Open Ableton LIVE. If you don’t have it yet you can find a Trial Version here.
-
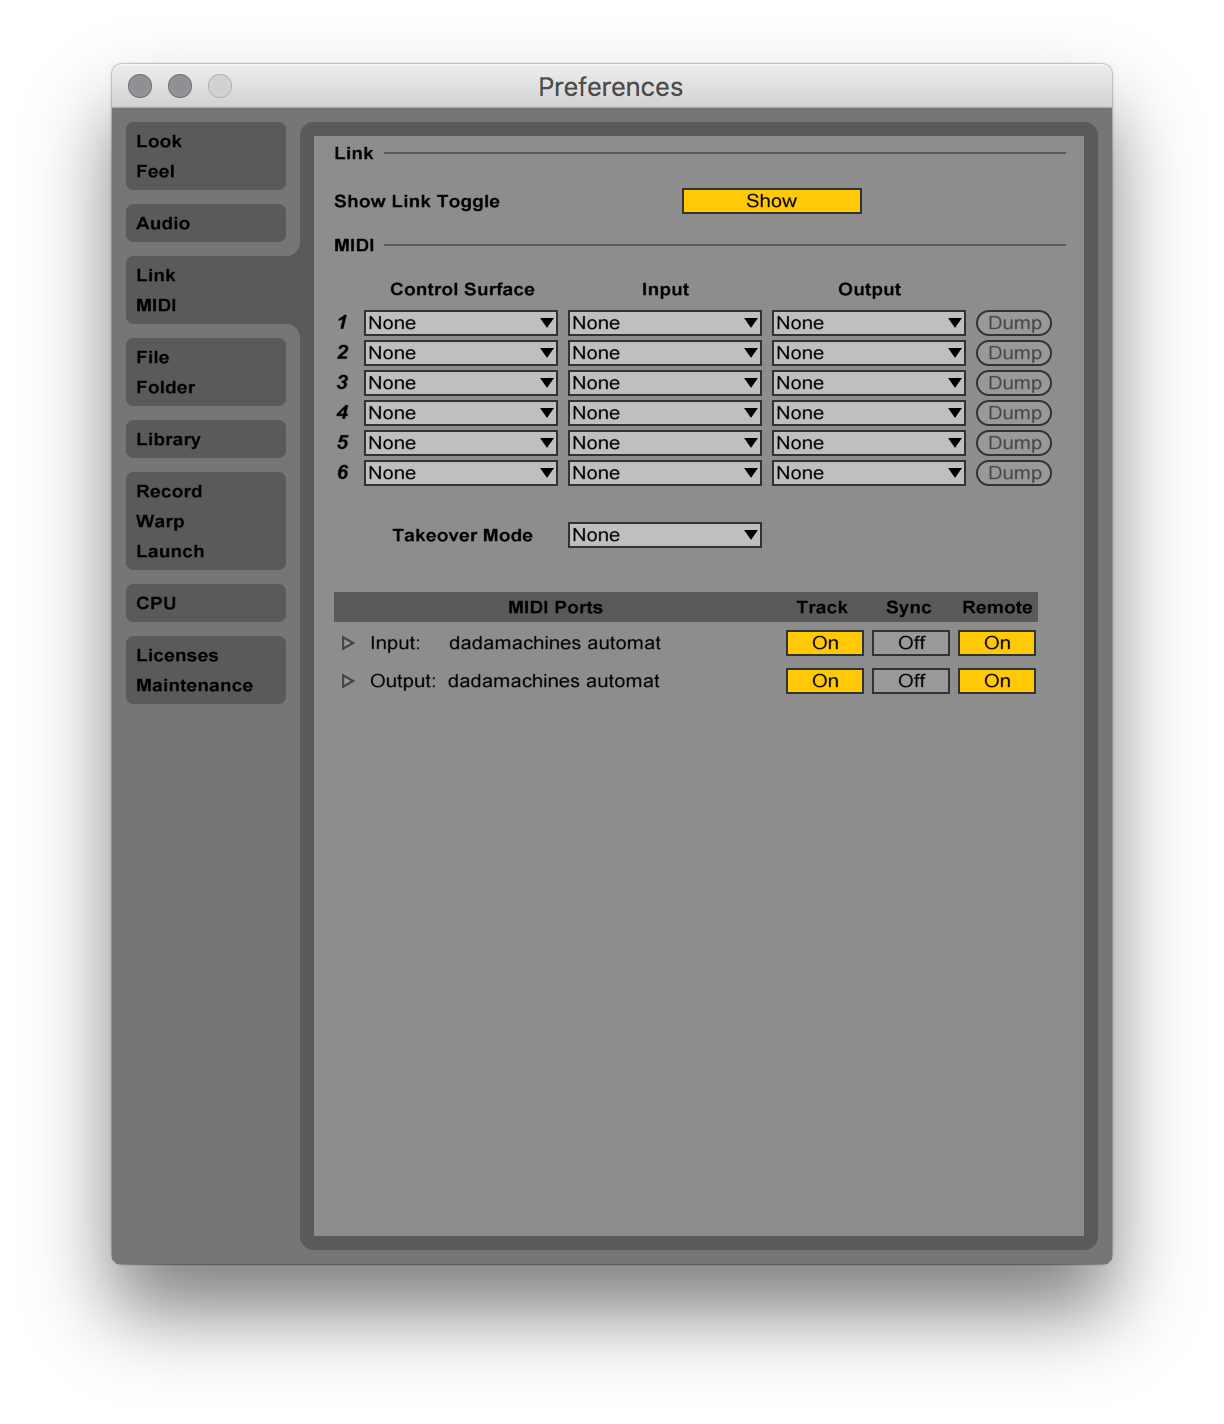
Open the Preferences of Ableton LIVE. (LIVE / Preferences or “cmd + ,”)
-
Set Track and Remote for Input and Output to [ On ]
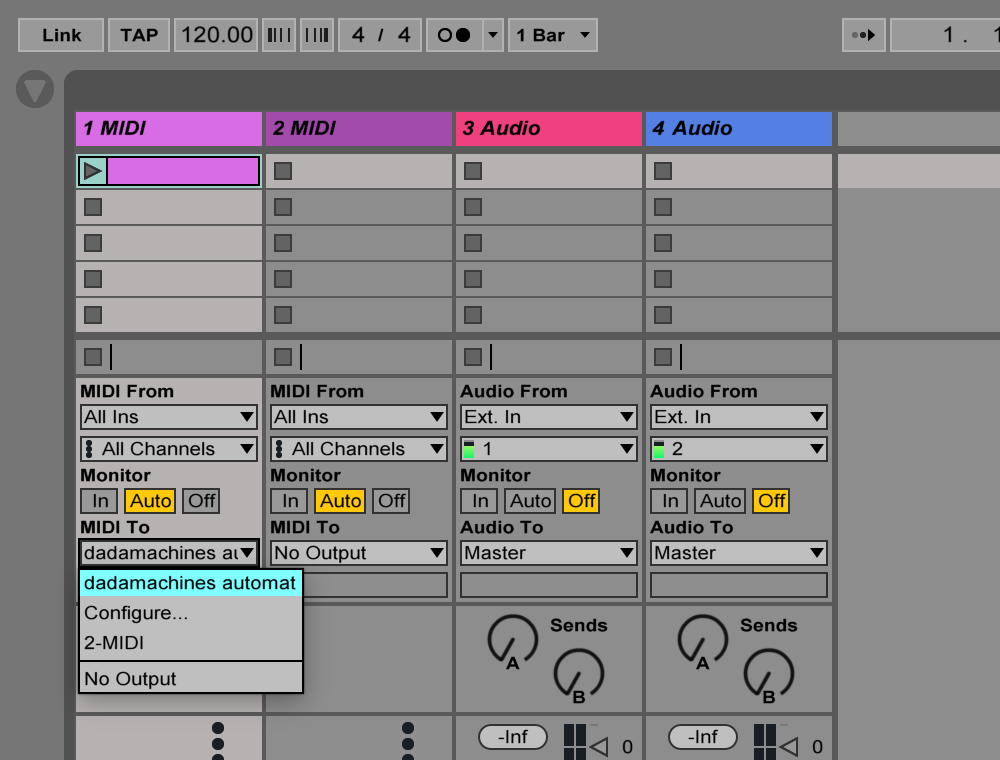
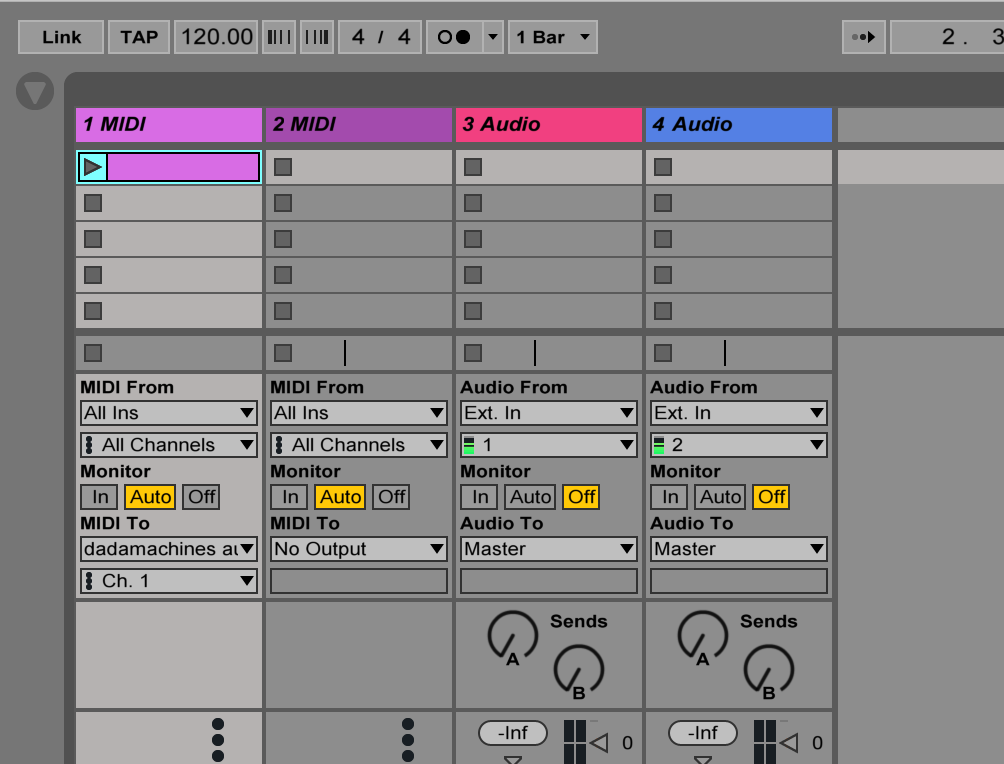
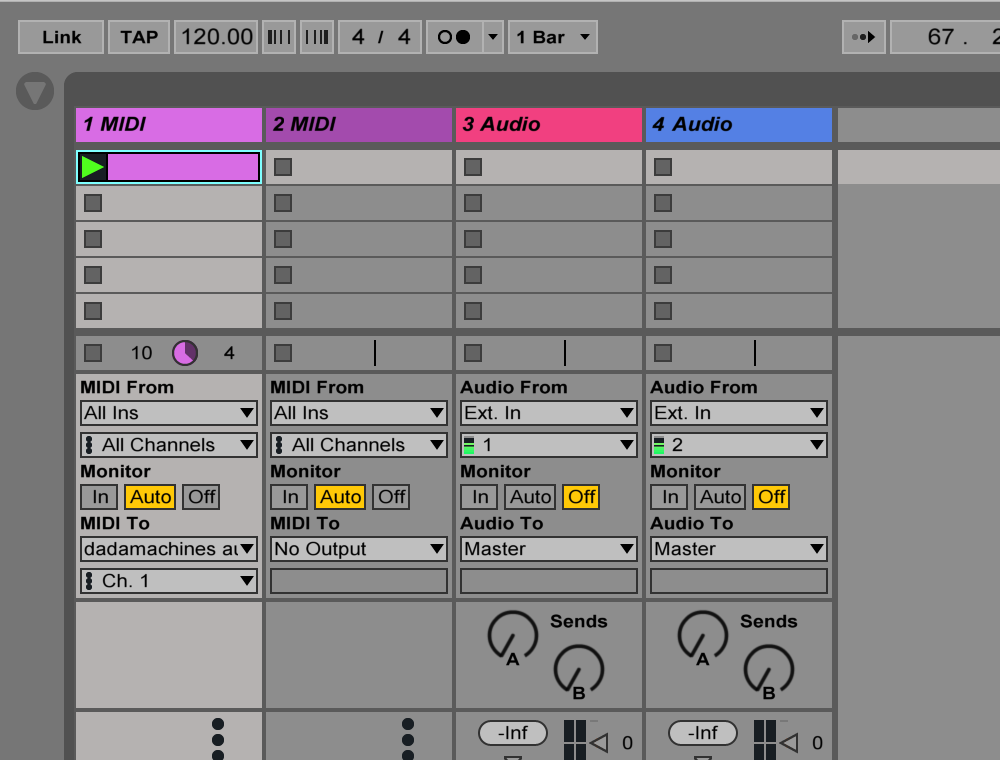
- Set the automat as target for “MIDI To”
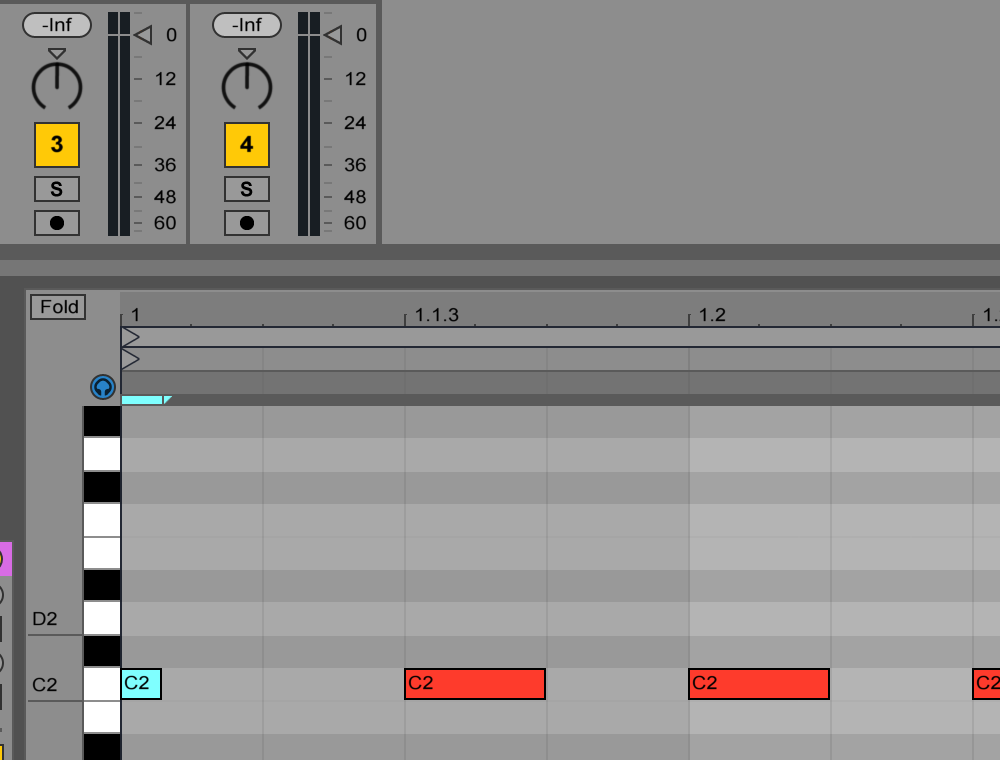
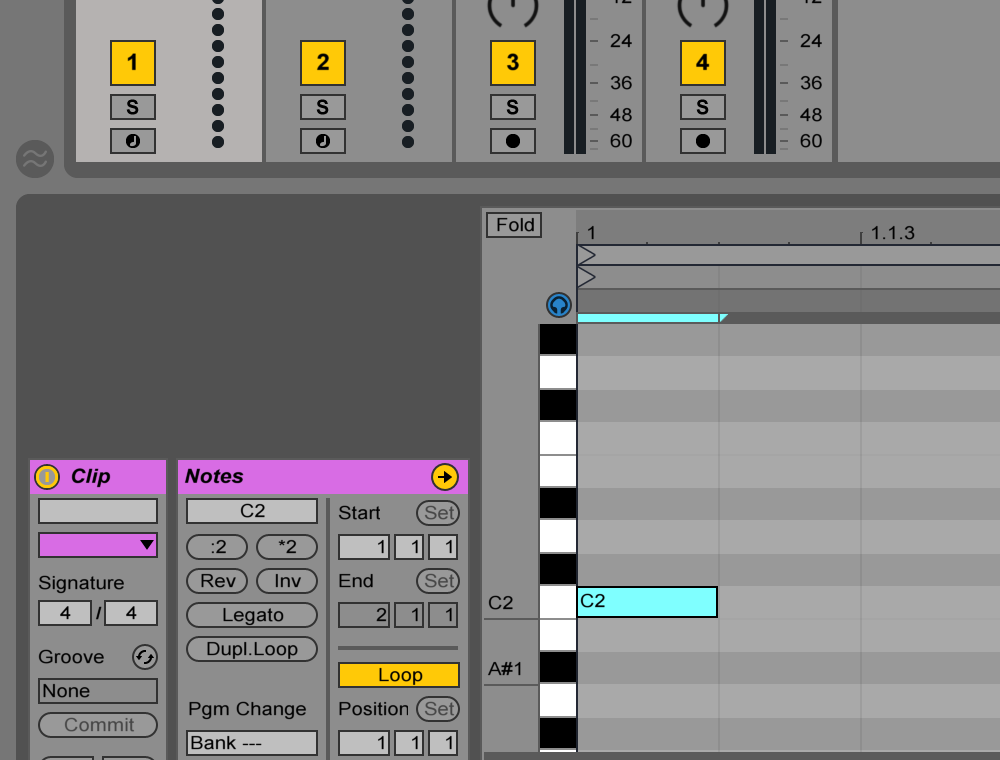
- Make new MIDI Clip with double clicking inside the column named “1 MIDI”.
- Create a Note(s) in your MIDI Clip
- Play your newly created MIDI CLip by pushing the Play Icon (The gray triangle Icon > It will turn Green when playing)
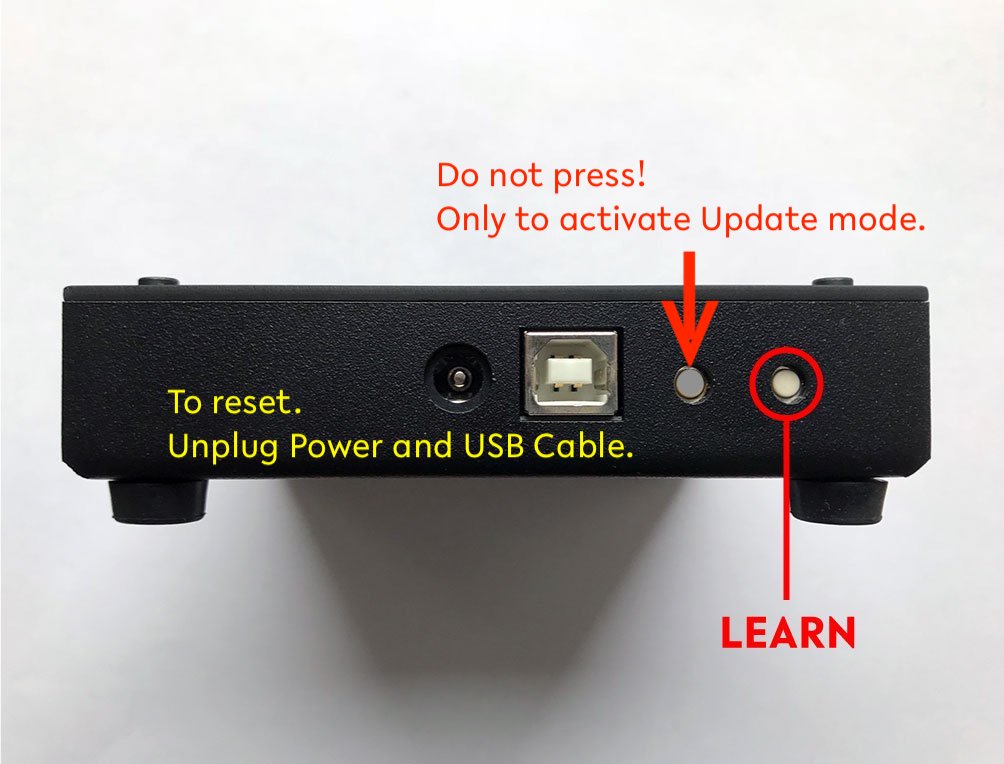
- Configure your automat controller by pressing the LEARN Button on the backside once for simple LEARN or twice for advanced LEARN. simple LEARN will receive the lowest Note for the 1st Output and assign the 11 following notes to the other Outputs (chromatic). advanced LEARN lets you assign / learn Note by Note for each Output.
- To change the sound / dynamics of your setup you can play with different Note Length. Simply drag them with your mouse to make them shorter or longer. You can as well select multiple at the same time.